
| << back | INDEX | next >> |
|
|
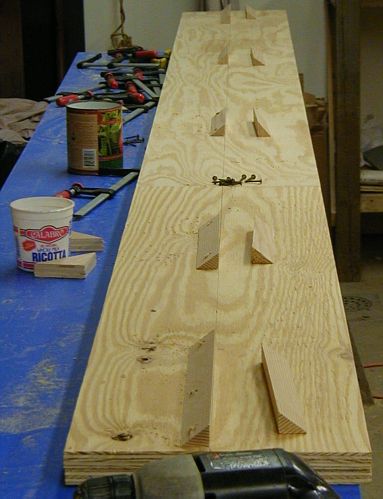 |
I
have decided to build a plywood strongback since it will be used for the
construction of quite a few kayaks. The whole piece is made from one and
a half sheets of 3/4" plywood. The layered plywood is more stable and
resistant to warping in the long run. If you are building only one kayak, you need not go this far to make a flat and straight foundation. You can use 2" x 12" lumber or any combination of plywood or even particleboard. The whole objective is to build a flat table surface 12" (30cm) wide and 12 ft (3,65m) long. You may already have a surface like that available (one plank attached to an aluminum ladder, a plank on a garden wood bench, a plank on a shop bench or a table etc...) What really matters that it is straight and with minimal twist. |
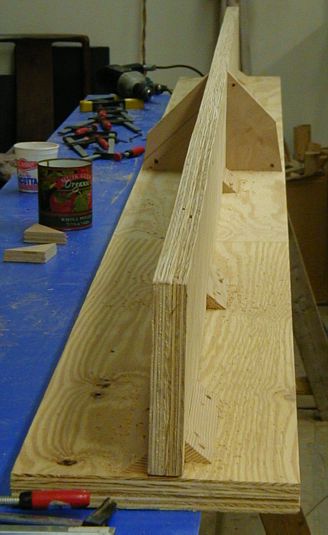 |
As a standalone profile, the "T" shape uses the least amount of material to build an accurate strongback. The top edge of the vertical beam that supports the horizontal piece was cut perfectly straight. Use a thin string or fishing line and a pencil or a magic marker to establish the cut line. Trim with circular saw. |
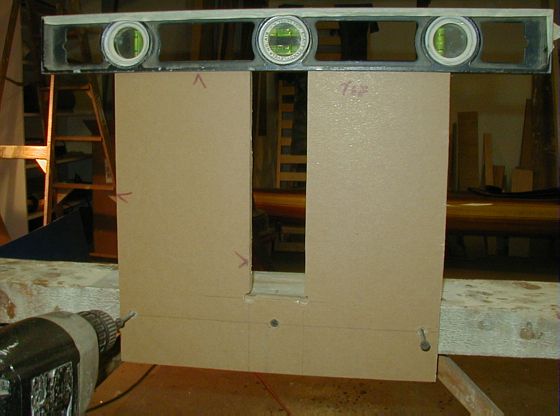 |
The receiving piece for the strongback is leveled laterally (side to side) and screwed into the horses. The attachement of the second piece will give you the opportunity to level the strongback longitudinally. |
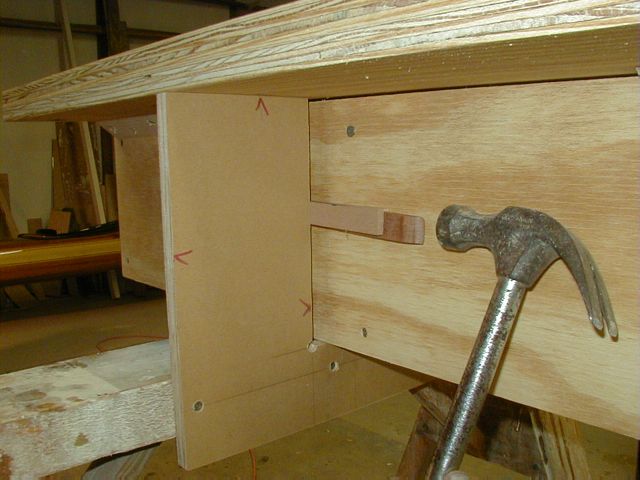 |
Note that the table rests on the top of the receiving piece - nice and horizontal. The slot was cut a bit wider to allow simple, quick but secure fastening with a wedge. Adjustment and disassembly is a snap. |
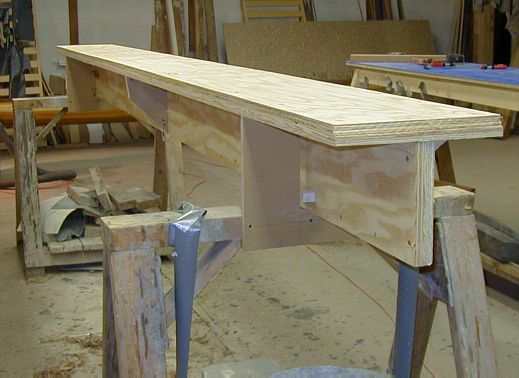 |
Ready for hull station blocks. |
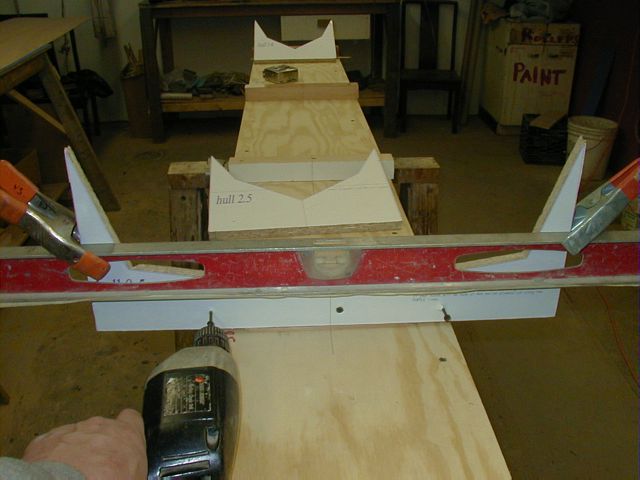 |
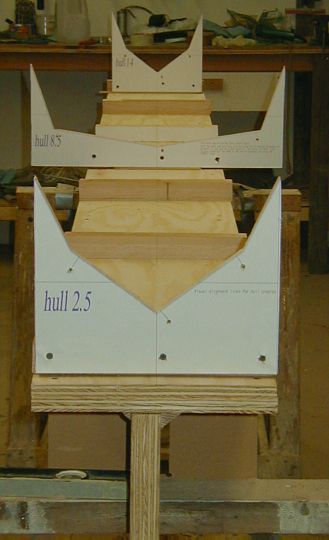
Establish and draw a centerline on the strongback first using the string method. Lay out and fasten the station blocks according to spacing directions in the plans. Starting with the middle station centered and level, the two remaining forms are easy to align and affix. |
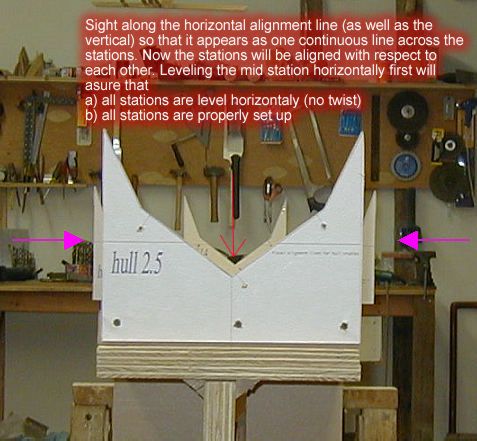 |
Align stations by the centerlines and the horizontal lines. |
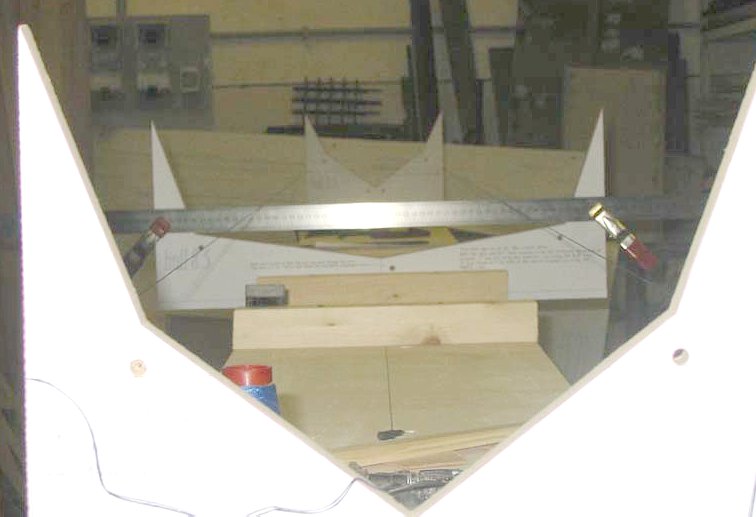 |
Here
is a clever and quick way to align the stations if you do not trust your
eyes or the station configuration makes it hard to sight all three stations
at the same time. In this instance the two end stations are installed first and leveled, then the strings are stretched from the alignment lines between the two stations and then the mid station is easy to align to the strings as well as the centerline. This picture was sent by Cristiano Monzillo, builder of the Cirrus . |
 |
A couple hours later,
the accurate strongback mold is ready to receive the hull plates. To get
to this stage will take about one afternoon. The cumulative time saved
thanks to this setup will be measured in days over the length of the project.
|
| << back | INDEX | next >> |
| 1 2 3 3a 4 5 6 7 8 9 10 11 12 13 14 |
| Home | Kayak Designs | Kayak Shop | Materials | Kayak Gallery | About us |
| Building Manual | Plans | Sandwich Core | Wood Kayak | Order | |
| Epoxy Test | Abrasion Cloth | Rudder | Resources | Choosing Kayak | Guestbook |
If you notice any problems with the site (i.e. error links, missing images) please, let me know. Thanks
Mail:
Vaclav Stejskal
10 Colonial Court apt. 73
Stoneham, MA. 02180
USA
Tel: 781-481-9261
© 1999
- 2020 Copyright Vaclav Stejskal
All rights reserved
Last page update:
11 January 2020