
|
||||
| INDEX | next
|
 |
If
you would like to mount your fixed footbraces by drilling through the kayak
skin (the way most kayak manufacturers do), then the screws supplied with
the Yakima footbrace set will work fine. If drilling is not an option, then
a slight modification will be required. The problem is that the screws supplied
with the footbraces from the factory are not suitable to be threaded from
the 'top'. The head of the screw is too wide to pass through the foot peg
slot and the threaded stem is too short to reach the tapped hole. (1/4"
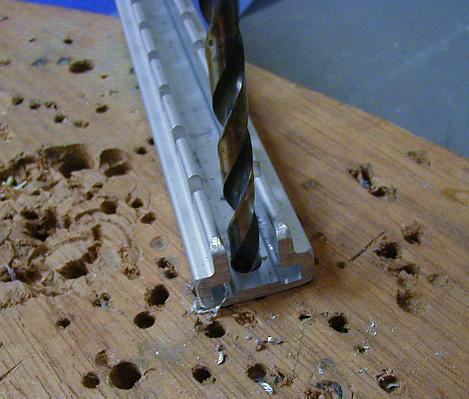
standard thread). So, the first step is to drill out the thread in the aluminium rail so the the screw can freely pass through (both holes in the rail). |
 |
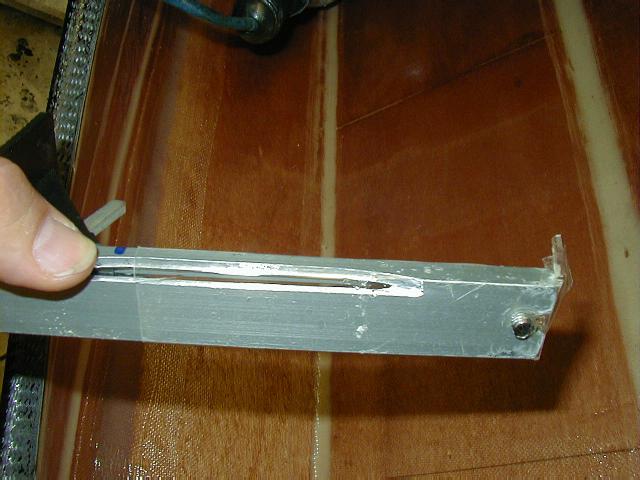
I
believe that the best way to install these things is to make everything
maintainable, removable and easy. The front of the rail will receive a slot so that the screw needs to be only loosened (without being removed) and the rail can slide in and out. The head of the screw fits fine into the wider opening. |
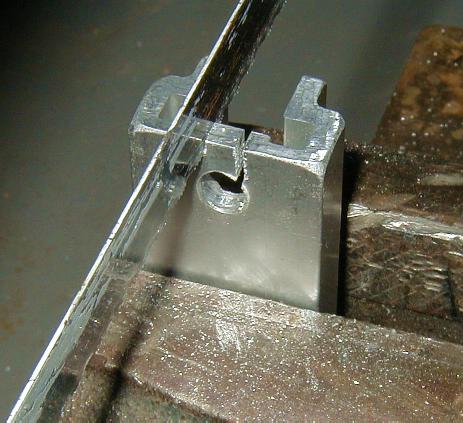 |
Detail of slot cutting. Use a file to smooth the cuts if needed. |
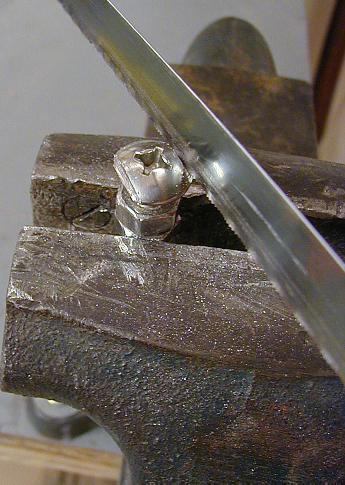 |
Unfortunately,
a simple slot is not practical or desirable on the cockpit side of the rail,
so I am modifying the screw head so it can pass through the foot peg slot. The reason for this is that the footbraces are 'pushed against' so the slot in the front is effective in resisting the force while this same slot in the rear would result in a weak attachment. |
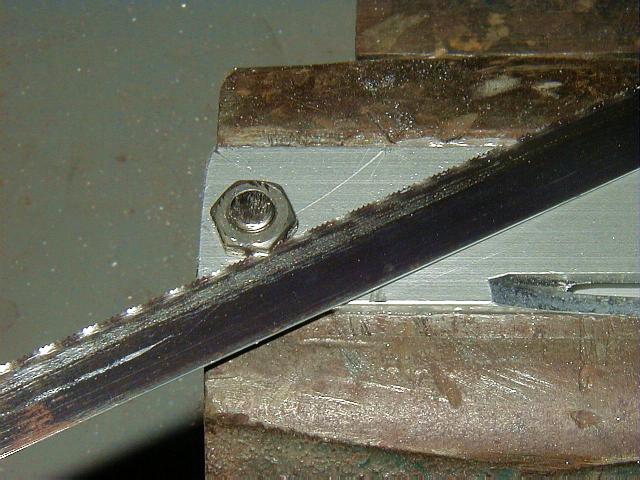 |
Once the modifications are complete, the screws are tightened onto the rail, the thread is trimmed to the nut and the nut itself is notched to for a better grip in the epoxy. A stronger solution still is to put a stainless washer under the nut. Roughen the bonded side of the washer with coarse sandpaper, grinder of a file so that the washer can also bond with the epoxy. |
 |
The next vital step is to create a nonstick surface on the aluminium rail so it can be removed once the epoxy putty hardens. Clear packing tape serves as the perfect mold release. make sure that only the screw protrudes 'unmasked'. |
 |
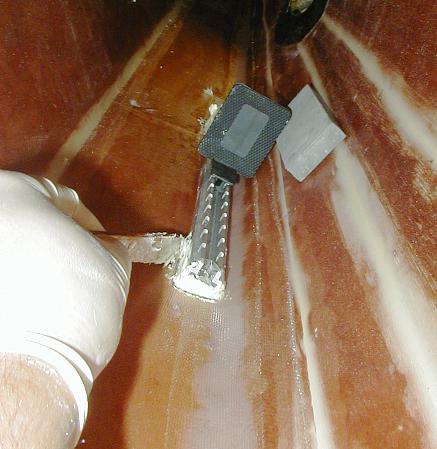
Once
the bonding areas are protected with the tape and the screws are fastened,
a bead of epoxy putty is 'buttered' on. Make sure to force the epoxy into
every 'nook and cranny' around the nut. The putty consists of epoxy, colloidal silica (Cabosil) and milled fiberglass. For high stress bonding like this, it is a very good idea to reinforce the epoxy matrix with longer fibers like the milled fiberglass (milled Kavlar or carbon). TIP: If you don't have milled fiberglass, take a scrap of fiberglass or better still some graphite cloth and chop it with scissors into 1/4" (6mm) or smaller bits. You will need only about a table spoon of this to make all the putty you need. The reinforced putty will be immeasurably stronger. |
 |
I
am doing the footbrace mounting right after the kayak
bonding operation. The fiberglass tape is still fresh. The footbrace
is placed on location markers drawn before the deck was bonded to the hull.
In this instance, I waited to bond the footbraces until the taping was finished
since the pegs sit right on top of the new tape. Removal of excess putty around the bond. Note the 5/8" Minicel foam spacer supporting the footbrace. The deck is on the right side. The spacer is there for two reasons:
|
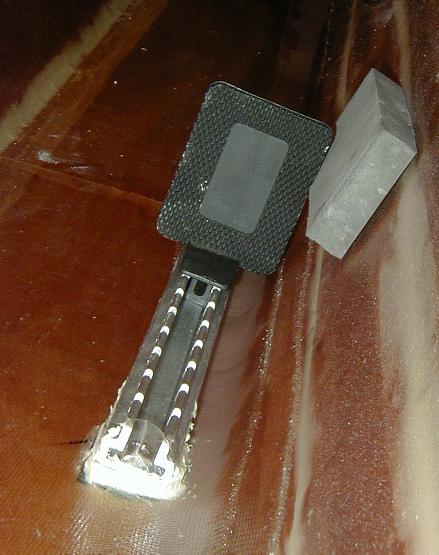 |
Close up |
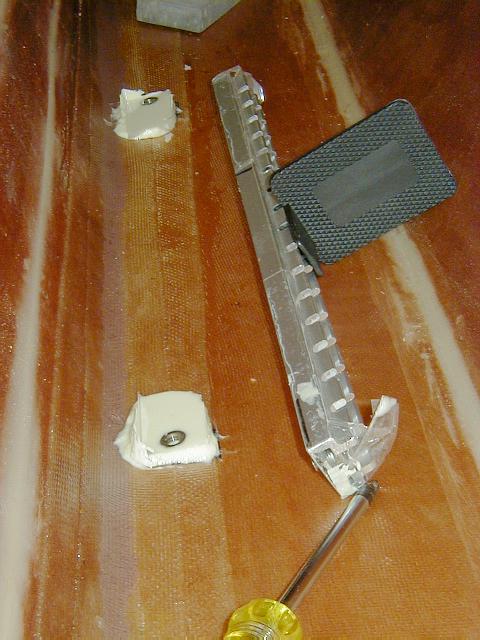 |
Next day (if fast epoxy is used) a tap with a hammer on the side of the foot peg will break the bond. Remember to loosen the screws first !! |
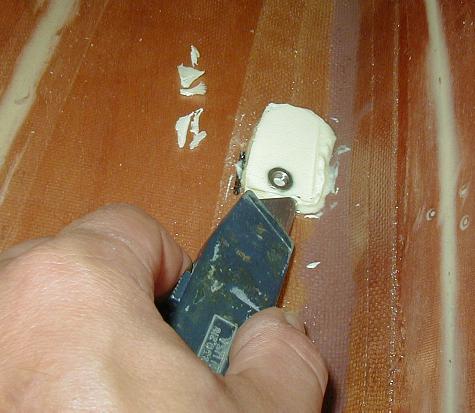 |
Cleaning
up. The bonded area is perfectly molded to the shape of the rail. Now, the removal of the footbraces for whatever reason will be a snap and if you decide to install something totally different at a later date, you don't need a stick of Semtex to blast the footbraces off :) See also 24ab. Mounting sliding footbraces |
| INDEX |
| Home | Kayak Designs | Kayak Shop | Materials | Kayak Gallery | About us |
| Building Manual | Plans | Sandwich Core | Wood Kayak | Order | |
| Epoxy Test | Abrasion Cloth | Rudder | Resources | Choosing Kayak | Guestbook |
If you notice any problems with the site (i.e. error links, missing images) please, let me know. Thanks
Mail:
Vaclav Stejskal
58 Wood Ln.
Acton, MA 01720
USA
Tel: 781-481-9261
© 1999
- 2024 Copyright Vaclav Stejskal
All rights reserved
Last page update:
9 May 2024