Back to Home Page        
  back INDEX next


24a. Foot braces

Click on any image to see the full size version


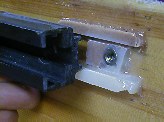
The anchors for these Yakima foot braces were done right before the shells were bonded together.

  • cut screws with a hack saw so that they don't protrude from the self locking nut when tightened onto the plastic track.
  • put a small patch of masking tape on the back of the nut so that the screw is not fused with the nut as the whole assembly is pushed into the epoxy slurry
  • With the track, screws and nuts tight together,position the assembly in the kayak and mark the spots where the nuts contact the hull.
  • See sliding footbrace installation page for more info on
  • modification of the plastic track.
  • Drill 1/2" dia. holes HALF WAY through the wood strip core. In addition to a stronger bond this allows the rail closer to the hull and gives your feet more space.
  • Mix thick bonding putty and fill the holes
  • Imbed the whole assembly in the epoxy and secure temporarily with a duct tape at the desired angle.
  • Drip more epoxy slurry around the nut so that a molded bed is formed around the rail (as seen in the picture) Use masking tape from below to stop the epoxy from dripping through (Use fast setting epoxy if possible)
  • unscrew the rail and pry it out carefully after the epoxy hardens completely. The plastic track separates with ease.
  • This sliding foot brace assembly is very solid and easily installed and removed from the kayak.
  • Details for fixed footbrace installation
A few installation details. This took place about 1/2 hour before inside hull glassing. Use sharp knife to slice the fiberglass over the holes (after it is wet out) and imbed the screws into epoxy putty.
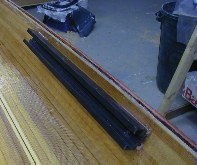
Remove rail before bonding kayak together and protect the attachment points from epoxy with some masking tape.
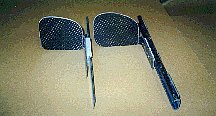
If you like to build everything from scratch, foot braces are a good project. These are mostly from carbon fiber with Teflon slides. The left foot peg is adjustable and the right one is for rudder.
If you are not into making these little parts, Yakima footbraces make a great substitute.
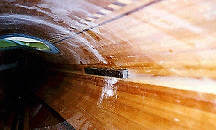

Some builders drill through the kayak to attach the footbraces. This is completely unnecessary in wood strip kayaks.

This photo illustrates a piece of mahogany bonded right above the sheerline for holding the screws and the home built rail.

A bulkhead will be put in next.

See more details on fixed and sliding Yakima installation:


INDEX


Home Kayak Designs Kayak Shop Materials Kayak Gallery About us
Building Manual Plans Sandwich Core Wood Kayak Order E-mail
Epoxy Test Abrasion Cloth Rudder Resources Choosing Kayak Guestbook

If you notice any problems with the site (i.e. error links, missing images) please, let me know. Thanks

Mail:
Vaclav Stejskal
10 Colonial Court apt. 73
Stoneham, MA. 02180
           USA
Tel:  781-481-9261

E-mail  

© 1999 - 2020 Copyright Vaclav Stejskal
All rights reserved

Last page update: 11 January 2020