
|
||||
| INDEX | next |
 |
Want
to make your own composite tubing? Here is a quick way to create components
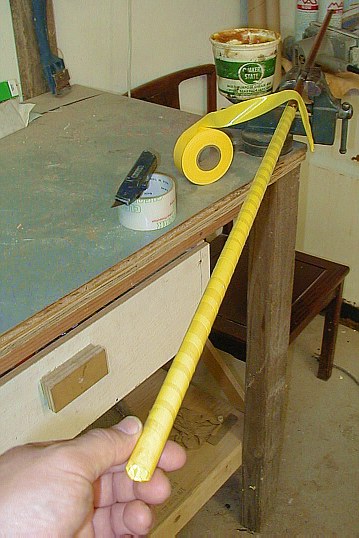
for handles, riggers, struts etc.... The main trick in tube making is the preparation of the mandrel (the mold) so that the finished tube can slide off. Some manufacturers use solid, highly polished stainless steel rods relying on the principles of thermal expansion to make and remove the parts. I have no such thing in my shop but I got plenty of copper tubing, plastic tape and axle grease. 1. Select the straightest possible pipe and wet sand it (360 grit) along the length to remove all protrusions and burrs. 2. Apply a thin layer of grease so there is actually grease on the pipe not just a greasy look. The grease will be the 'ball bearings' as well as a spacer that will separate the tube from the mandrel. Wrap some non stick tape on the mandrel next. It is desirable that the tape is strong (such as the clear packing tape) so it can be removed in one piece later. This tape I am using will tear easily but the fate of this tube is to be chopped up into small pieces so the tape is easy to reach and remove. Try plummers' teflon tape, heavy gauge polyethylene plastic etc...even wax paper might work. |
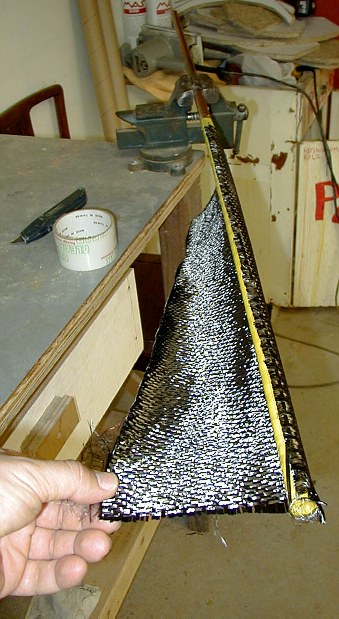 |
3. A double sided adhesive tape holds the unwieldy 10oz. carbon cloth (6" wide) on the mandrel so I can wrap it tightly. Four hands would be helpful here. Lighter style of cloth will conform better. Decide how many times it should wrap around the mandrel. The finished tube wall thickness came to about 3/32" (2.5mm). |
 |
4. A thread keeps the fabric wrapped. A thin sowing thread is far better than this fat 'rope' I am using. Wrap it closer together. |
 |
5.
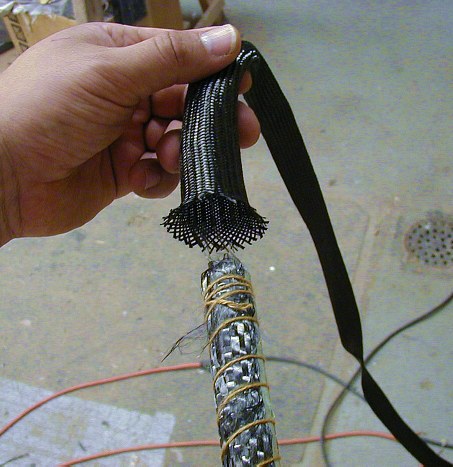
A bias woven sock (sleeve) goes on the mandrel next. The 'bias' or 45 degree
weave alows the sleave to change diameter by streatching and compression.
I believe this one can be used on mandrels from 0.75" to 1.25"diameter.
The orientation of the fibers will change according to the tube diameter. |
 |
Slide the whole thing in. |
 |
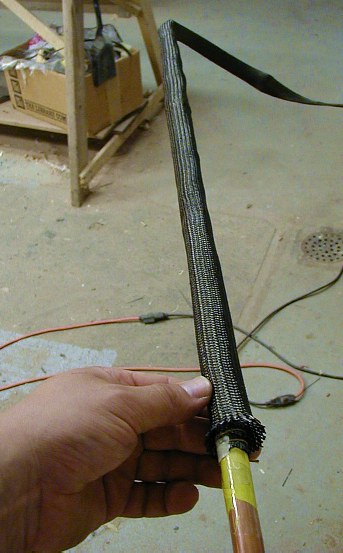
6. Streatch and tighten " vis-à-vis Chinese finger trap". The sock squeezes the dry lay-up perfectly and concentrically around the mandrel and adjusts to the exact diameter. |
 |
7. Now, all the layers in the lay-up are dry and will need to be saturated by epoxy - completely! Select the thinnest and slowest setting epoxy available to you, warm it up and brush it on. I am using WS207 which is neither. Fortunately, carbon is very 'epoxy-phyllic' so the fibers like to draw the epoxy inside by cappilary action. See Epoxy Tests for epoxy inspiration. |
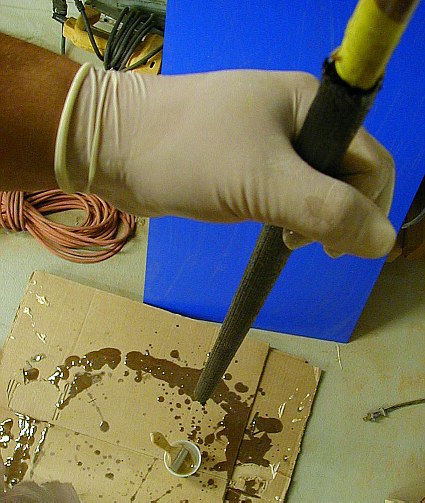 |
8. Now, massage the epoxy into the rod. Give it a real workout so that the epoxy can penetrate all the way to the core. Once the epoxy hardens, clamp the tubing in a vice and pull off the tube. You will thank your bearing grease. |
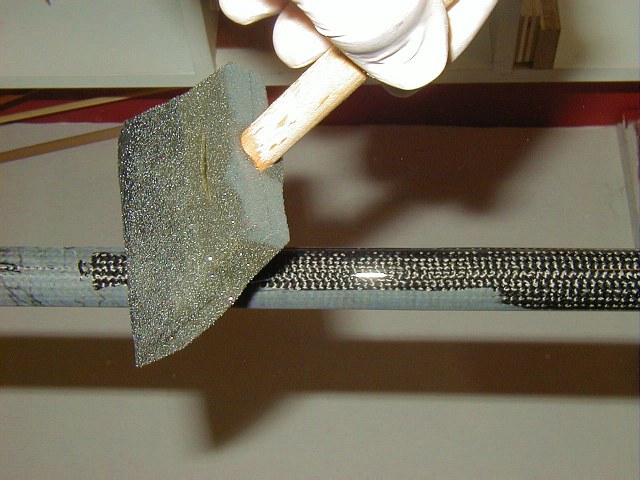 |
9. Wet sand the tube and apply more epoxy filler coats. After the final wet sanding, give it a protective coat of varnish or polyurethane. |
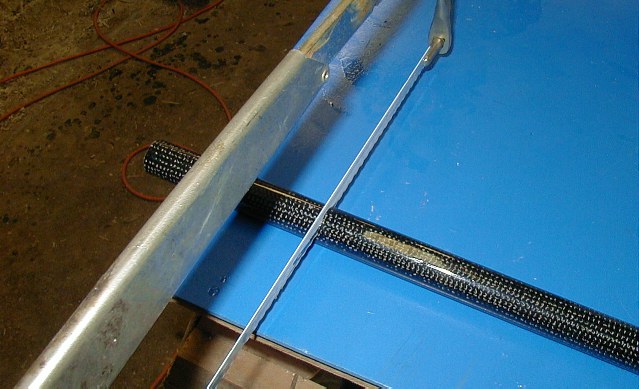 |
10. Chop to desired length. |
 |
11.
Dip in Plasti dip. A nice, clean and contrasting finish handle is born.
It is also very strong and feather light. You can also easily make graphite lashing hooks and kayak hardware by compression molding. |
| INDEX | next |
| Home | Kayak Designs | Kayak Shop | Materials | Kayak Gallery | About us |
| Building Manual | Plans | Sandwich Core | Wood Kayak | Order | |
| Epoxy Test | Abrasion Cloth | Rudder | Resources | Choosing Kayak | Guestbook |
If you notice any problems with the site (i.e. error links, missing images) please, let me know. Thanks
Mail:
Vaclav Stejskal
58 Wood Ln.
Acton, MA 01720
USA
Tel: 781-481-9261
© 1999
- 2024 Copyright Vaclav Stejskal
All rights reserved
Last page update:
9 May 2024