
|
||||
| << back | INDEX | next >> |

 2
2  3
3  4
4 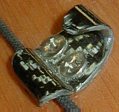
| Tired
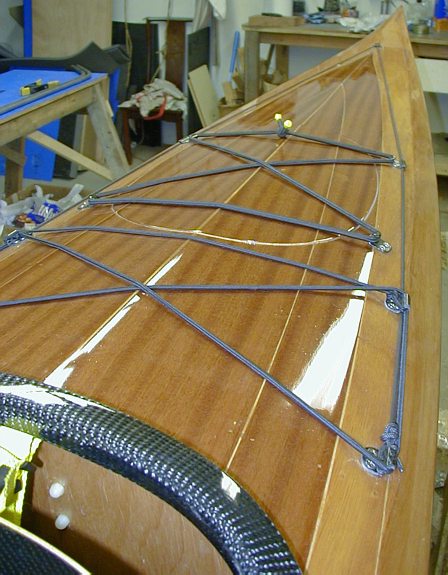
of the standard (heavy, bulky, not the right size or shape) deck lines hardware?
Here are examples that you can make for your own craft. The pictures above
show four types of eyes and lashing hooks I made for the Cirrus deck. The
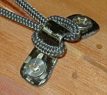
inspiration for this came from lashing hook # 4. I needed something that
would hold the bungee on the hatches but also serve as a 'pass through'
eye for the deck lines. I looked around for hardware with similar functionality
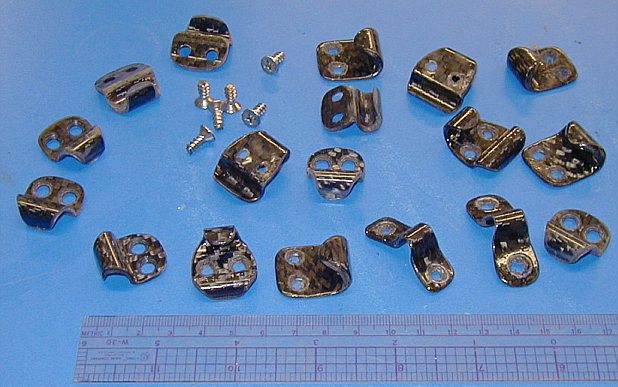
but finding 'zip', I decided that the Cirrus would benefit from a whole
customized set of graphite hooks and loops. The entire set weighs less than
the screws used to attach it and the pieces are stronger than the plastic
hardware found on commercial kayaks. The best feature by far is the size,
which is less than commercial plastic or stainless hardware not to mention
wood. The individual pieces (of the same type) are cut from one profile (blank) which is made long enough to contain the desired number of hardware pieces that you need. The blank is then chopped up and the individual pieces shaped on a belt sander which makes it very efficient and quick. It takes about 2 minutes to belt sand the rough cut piece into finished shape and another 2 min. to wet sand the edges. Sanding block can be used as well since carbon composites sand very well - unlike Kevlar or S-glass. As a note of interest, the molding technology (compression molding) employed here costs nothing yet the molding systems employed in industrial applications to make similar fiber reinforced components (good resin to fiber ratios with both sides having glossy polished finish) are very expensive for small production runs. |
 |
1.
The following series illustrates the molding system for the kayak deck eye
seen in picture # 1. First, the position of the eye is located and the deck is taped over with clear plastic packing tape which is the "mold release". Next, I taped down a 1/4" bead ripped from a cedar strip. This will form the inside of the eye. You can use a profile of any diameter. Again, cover the bead with packing tape. |
 |
3. A resin rich "pre-preg" cloth is placed over the mold and covered with another layer of mold release plastic. In this instance I have used a type of plastic used in Polaroid instant film (about 0.3mm thick). The film is optically smooth and glossy and will not stick to epoxy. The thickness of the film prevents wrinking and the formation of sharp corners yet the material conforms to a small radius on the inside or outside corners of the mold. Mylar, polyethylene, teflon even out friend clear packing tape will work fine as a mold release.The other side of the mold is a piece of stiff Minicel foam with a groove in the center to exert pressure on the pre-preg in the inside corners. |
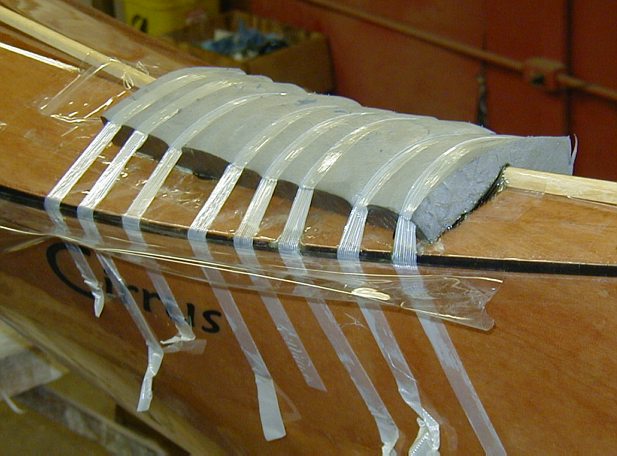 |
4. Even compression...You can achieve a much better fiber to resin ratio by using stiffer mold with solid backing and comperssion by nylon strapping with a ratchet or a clamp. The epoxy will squeeze out of the layers and ooze out for a while until it gels so take this into consideration. See the plastic "gutters" on the sides for diverting the drips. |
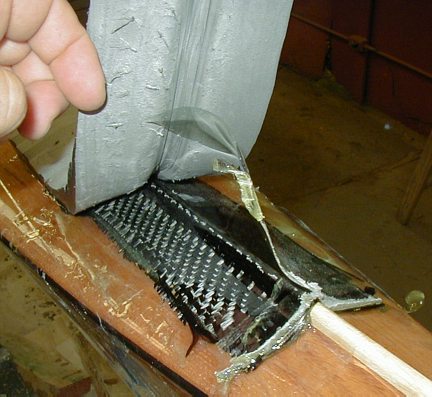 |
5. Set and peel. |
 |
6. Finished blank yielding about 10 eyes. The gloss and smoothness is excellent on both sides. You can decide how strong you want the component to be by controling the number of fabric layers and fiber orientation. Seven to nine layers will produce about 1/8" (3mm) thickness of the finished piece which is "overkill strong". |
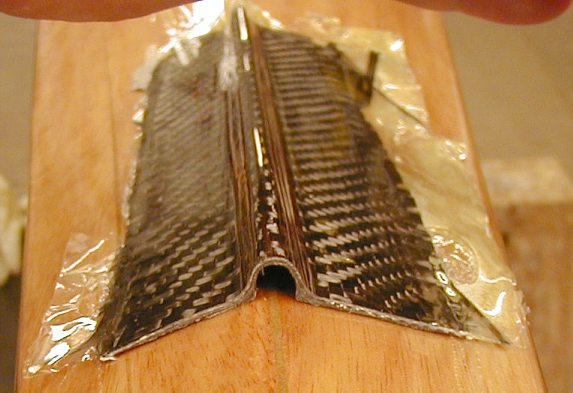 |
7. The end of the blank trimmed to reveal the true profile of the loop. |
| << back | INDEX | next >> |
| Home | Kayak Designs | Kayak Shop | Materials | Kayak Gallery | About us |
| Building Manual | Plans | Sandwich Core | Wood Kayak | Order | |
| Epoxy Test | Abrasion Cloth | Rudder | Resources | Choosing Kayak | Guestbook |
If you notice any problems with the site (i.e. error links, missing images) please, let me know. Thanks
Mail:
Vaclav Stejskal
58 Wood Ln.
Acton, MA 01720
USA
Tel: 781-481-9261
© 1999
- 2024 Copyright Vaclav Stejskal
All rights reserved
Last page update:
9 May 2024