
|
||||
| INDEX | next
|
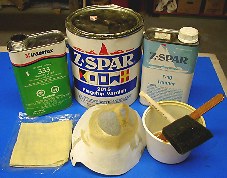 |
This is what I use
on my kayaks. The varnish here is Z*Spar Flagship 2015. I use
Z*Spar T-10 varnish thinner or Epifanes 333 brushing
liquid for thinning and better flow-out. |
 |
This
is another premium quality varnish I am trying right now. It is paler
in color than the z*spar. This varnish seems to produce a slightly better gloss and is also more abrasion resistant (it is certainly harder to wet sand than z*spar). For all its good qualities, it seems to dry about 2 to 3 times longer. While I customarily, sand and do one coat of z*spar per day, I find it impossible to do with the Goldspar. It just clogs up the paper. |
 |
"The Technique"
|
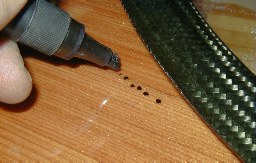 |
It is not unusual
to get a varnish sag or drip in every coat you put on (only practice
and knowledge of varnish behavior will improve it). |
 |
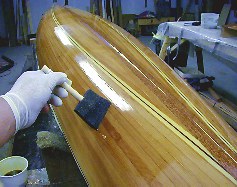
I
don't like to use power tools for sanding between the coats because even
the fine grits (320-400) will sand through the thin skin. The best tool
for large areas is a hand held 'plaster sander'. It works like a fairing
board that continues to improve the quality of the surface by knocking
down the high spots and allowing the dips and scratches to be filled. With that said, don't rely on varnish as a filler. Five or six lightly sanded coats will hide all sanding scratches but not ripples from poorly sanded wood. Use your hands only to sand the sharp contours such as the bow/stern tips. Remember that the varnish layers are vital in protecting the epoxy from UV light and not just for a glossy look. The picture illustrates sanding with 400 grit before the final fifth coat. |
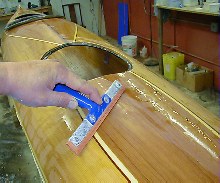 |
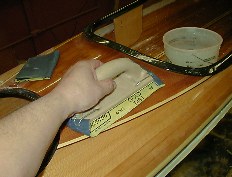
After
wet sanding the surface between the coats, the sanding residue (white
powdery stuff )on the surface must somehow be removed. Using plenty of
water and a rubber squeegee minimizes the usage of cloth and paper towels
( read DUST& LINT). This tool is also good to check on the progress of drip and sag removal. Remember that ALL imperfections are completely invisible under a layer of water. When dry, lightly swipe the surface with a clean tack cloth. Don't sweat the imperfections, drips, shiny spots and dust on the first coats of varnish. Sanding will remove those and by the last coat you will be looking at gleaming KAYAK itching to get on the water! |
| INDEX |
| Home | Kayak Designs | Kayak Shop | Materials | Kayak Gallery | About us |
| Building Manual | Plans | Sandwich Core | Wood Kayak | Order | |
| Epoxy Test | Abrasion Cloth | Rudder | Resources | Choosing Kayak | Guestbook |
If you notice any problems with the site (i.e. error links, missing images) please, let me know. Thanks
Mail:
Vaclav Stejskal
58 Wood Ln.
Acton, MA 01720
USA
Tel: 781-481-9261
© 1999
- 2024 Copyright Vaclav Stejskal
All rights reserved
Last page update:
9 May 2024