
|
||||
| back to page 18 | INDEX | back to 18a |
 |
Now,
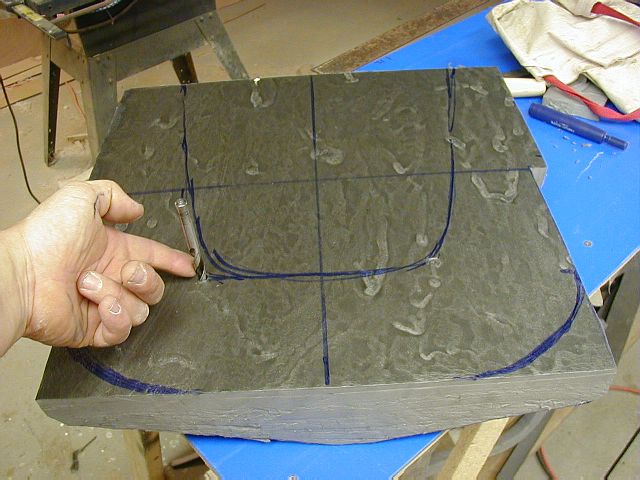
place the Minicell foam in the kayak or just sit on it on the ground. Remember
that the notches on the sides indicate the front of the butt plates so position
yourself in reference to those. Now, place your hands under your behind
and roughly locate where your sitting bones touch the foam. That point will
be the deepest hollow in the foam block. Here I am pointing to the spot. As you sit on the foam, mark the foam right under the middle of the thighs. That line indicates the deepest part of the hollowed out thigh support. |
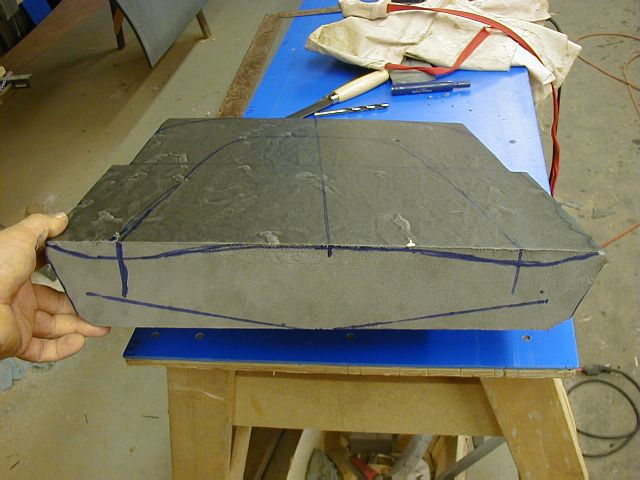 |
The front view provides more of a 3D perspective of the material that must be removed. I drew the shape freehand. This shape may or may not change as you try the fit at different stages of the shaping process. |
 |
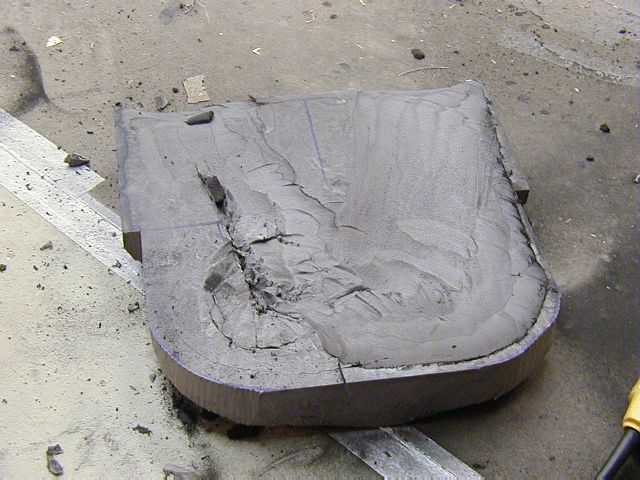
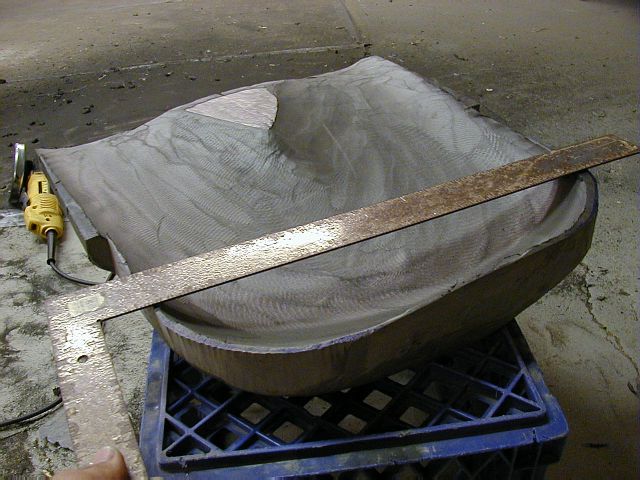
Once you start grinding, it will be difficult to judge the depth of the remaining foam. It makes no sense to leave it thicker than it should be but grinding all the way through is also a possibility to guard against. Here I am using a drill as gauge. The drill is aligned with the 'sitting bone' mark from the back and the depth is set only to the bottom edge of the 'V' hull profile. Now poke the drill straight down through the sitting bone marks to the set depth. Since the foam is thicker there, the puncture ends about 1/2" - 5/8" from the bottom. Now, your kayak seat profile [at the bottom] is likely different so take it into consideration. This is just one 'quick and dirty' way to gauge the depth. |
 |
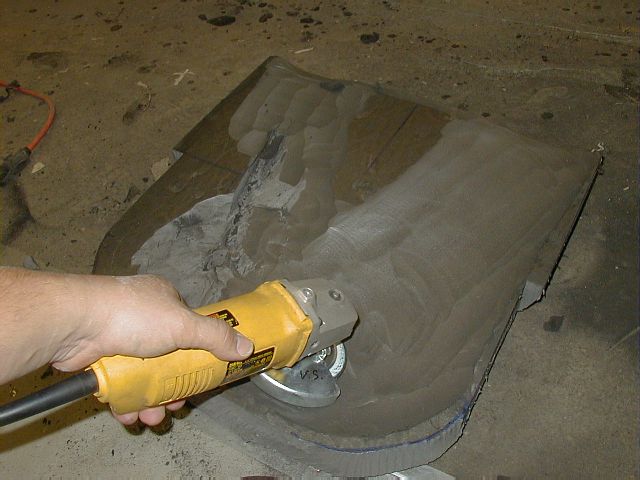
The puncture marks will
let you know when to stop grinding or if you are getting close to the
target depth. I find the grinding goes far quicker than if I had to stop
and measure the depth every few minutes. |
 |
TIPS:
|
 |
Almost there. I am just double checking the depth to make sure it is as deep as it can be and symmetrical. |
 |
Different view. Needless to say, this operation is best done outside or with good ventilation. Fortunately, the black dust is heavy, settles quickly and is easy to clean. When I swept the floor afterwards, it was barely a handful even though the volume of the block was reduced at least by 40%. The foam shrinks when heated to high temperature and most of the volume in the foam is gas so it is not surprising. |
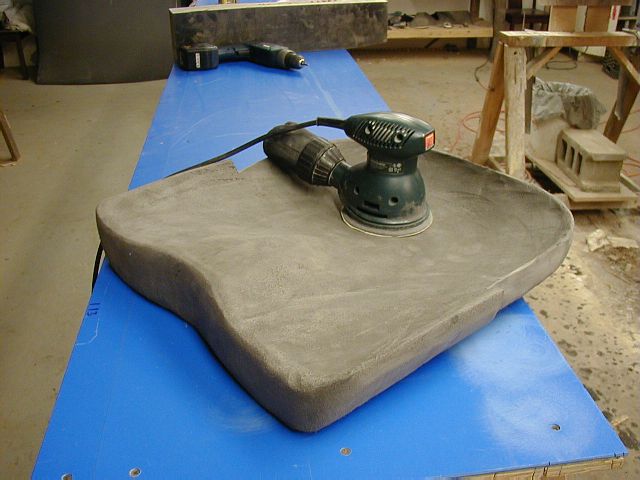 |
Now is the time to erase the grinder marks with an orbital sander. I use 100 grit paper. The sander is excellent in rounding and smoothing the corners, bumps and scars. Use this tool to bring out the nice velvety texture. By the way, it is also perfect for eliminating the foam crust on the thick blocks. Use the same procedure as with the grinder. |
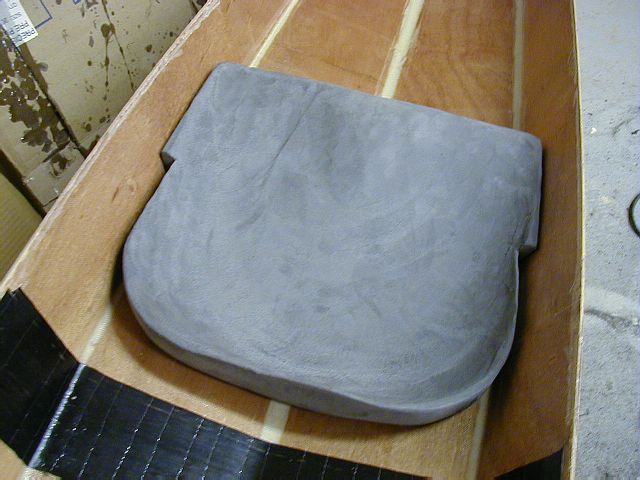 |
Finished
seat. 10oz. (300g)! I find this to be good enough. If you want perfection, keep sanding and/or use finer sandpaper. This seat was just a block of foam 60 minutes ago. Some builders finish it off with spandex fabric glued to the foam. Spandex will contour pretty much most compound curves. You can also carve a bottle holder in the seat which I will likely do later, once the seat is tested in action. |
 |
Glue
it into the kayak with a few dabs of GOOP glue or make it removable with
a few strips of self-stick Velcro (hook and loop) strips. Make sure to test
it in the kayak first before gluing it down permanently. Order your Minicel on-line . For other options see the Ordering page. |
| BACK to page 18 | INDEX | previous Minicel seat page |
| Home | Kayak Designs | Kayak Shop | Materials | Kayak Gallery | About us |
| Building Manual | Plans | Sandwich Core | Wood Kayak | Order | |
| Epoxy Test | Abrasion Cloth | Rudder | Resources | Choosing Kayak | Guestbook |
If you notice any problems with the site (i.e. error links, missing images) please, let me know. Thanks
Mail:
Vaclav Stejskal
58 Wood Ln.
Acton, MA 01720
USA
Tel: 781-481-9261
© 1999
- 2024 Copyright Vaclav Stejskal
All rights reserved
Last page update:
9 May 2024