
|
||||
| INDEX | next
|
 |
The
seal-channel: This term refers to the grooved ring that houses a waterproof
rubber gasket and also holds the hatch lid flush with the deck after the
seal becomes compressed. It can be made of plywood or of composite materials. Here again, I chose to make it as a laminate of fiberglass and scraps of graphite. Such channels can be built faster, cheaper and are immeasurably more abuse resistant that their plywood equivalent. Just think how much stuff will be rubbed against and dragged out past these thin flanges. Ruggedness is required here. |
 |
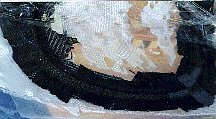
The
photo above shows a fresh lay-up of a composite channel. Using a simple
mold, a bit of epoxy putty and scraps of fiberglass one can make three of
these in one afternoon. Full details are covered in the Manual. Builders of One Ocean Kayaks will also find the construction covered in high resolution photos in the Builders' Pages This photo shows a heap of moist sand weighing down the fresh lay-up. It works somewhat like the technique of 'vacuum bagging'. The sand presses the lay-up against the mold, compressing the fibers together and squeezing out bubbles and excess epoxy. The resulting channel is light and strong. More importantly, it is of the exact shape as the hatch opening with a correctly sized gasket groove molded in it. |
 |
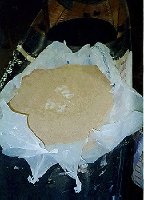
Separate the foam mold gasket from the seal-channel along the edges so it can be scraped out easily without tearing. The gasket here is 1/8"-3/16" thick and the same width as the finished seal. That is about half the thickness of the finished rubber gasket that will seal the hatch later. |
 |
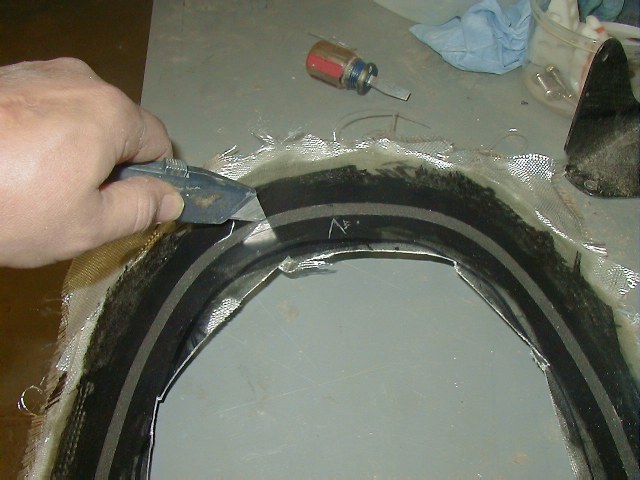
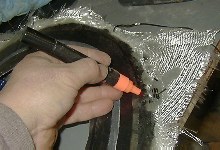
Scraping action. The epoxy is still very soft and shaving the groove smooth with the screwdriver is very easy at this point. After it is bonded to the deck and trimmed you can apply a coat of epoxy to give it a completely smooth finish. Sand the groove with a wet-dry 180 grit paper. If you feel the condition of the channel is good, you can skip the epoxy, and do it directly with varnish. The wood edges of the deck/hatch opening must be sealed, though. The bottom of the groove must be smooth to achieve a complete bond with the foam seal. The varnish coats will take care of that as long as the groove is not too rough. |
 |
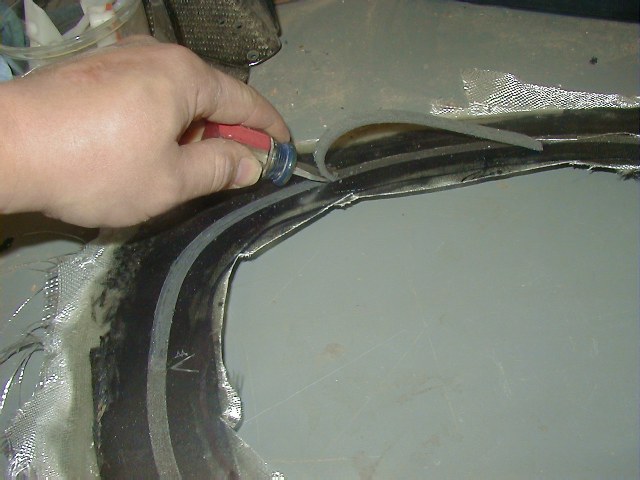
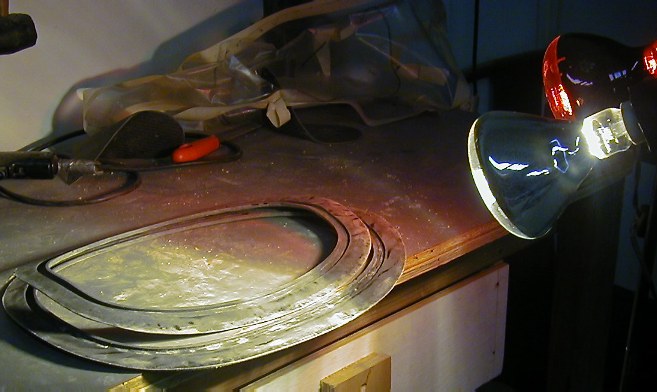
Marking the trim line of the 'blank'. Cutting with a jig saw and a bit of sanding to smooth the edges is all it takes before the channels can be bonded to the under-deck. |
 |
If you use slow curing epoxies, the channels will still be rubbery and soft the next day or two. Half an hour under heat lamps or in the oven (200F) will speed up the cure and the channels will become much harder when they cool down. Don't worry, they will not melt (only soften temporarily). |
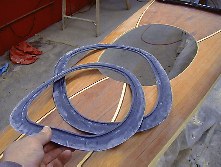 |
Finished channels ready to be bonded the next day. The black color comes from some graphite powder added to the epoxy. |
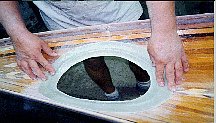 |
Dry fit over well sanded base. Some of the low blush, slow cure epoxies will permit bonding without prior sanding (if done within few days). MAS epoxy is one of them. |
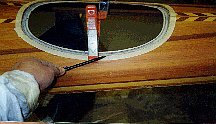 |
Here a channel is dry fit before bonding. The point is to align the gasket groove nicely to the deck rim and draw a few register marks. It's better to do it now than smearing the bonding putty under the deck later, trying to center everything. |
| INDEX |
| Home | Kayak Designs | Kayak Shop | Materials | Kayak Gallery | About us |
| Building Manual | Plans | Sandwich Core | Wood Kayak | Order | |
| Epoxy Test | Abrasion Cloth | Rudder | Resources | Choosing Kayak | Guestbook |
If you notice any problems with the site (i.e. error links, missing images) please, let me know. Thanks
Mail:
Vaclav Stejskal
58 Wood Ln.
Acton, MA 01720
USA
Tel: 781-481-9261
© 1999
- 2024 Copyright Vaclav Stejskal
All rights reserved
Last page update:
9 May 2024