
| << back | INDEX | next >> |
|
|
 |
Since
we do not have a nice self aligning bead and cove on the the edges of the
plywood hull and deck as we would have on a strip kayak, we can use some
tape (fiberglass reinforced is best) and beads of hot glue to "stitch"
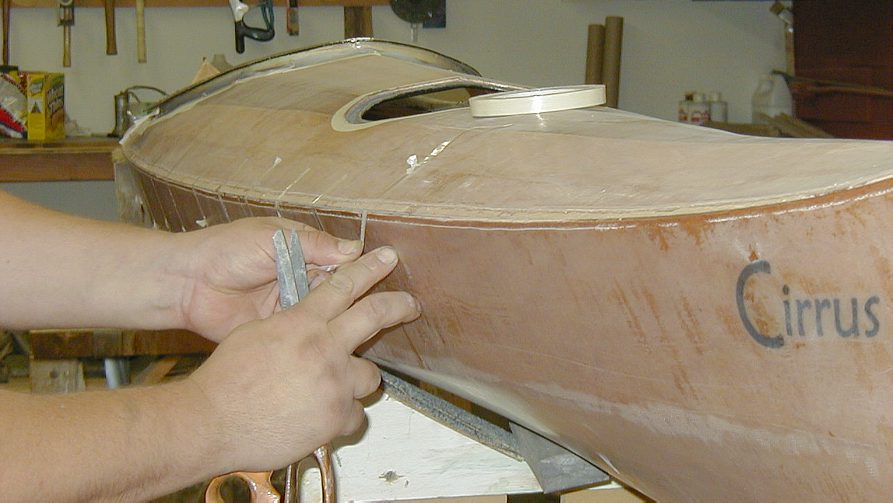
the pieces together temporarily. First, I align and tape the shells together at both tips of the kayak, then I use the wire drill holes on the hull and deck to align the cockpit area. At this point we can tape the deck and hull together aligning the edges with a knife blade as we go about 6 inches at a time. Note: Before the hull and deck are brought together, it is vitally important to apply some epoxy over the exposed wood edges of the plywood on the inside of the kayak tips (about 18" ) where it is hard or impossible to reach when we do the inside taping. The raw wood must be completely sealed with the epoxy everywhere! |
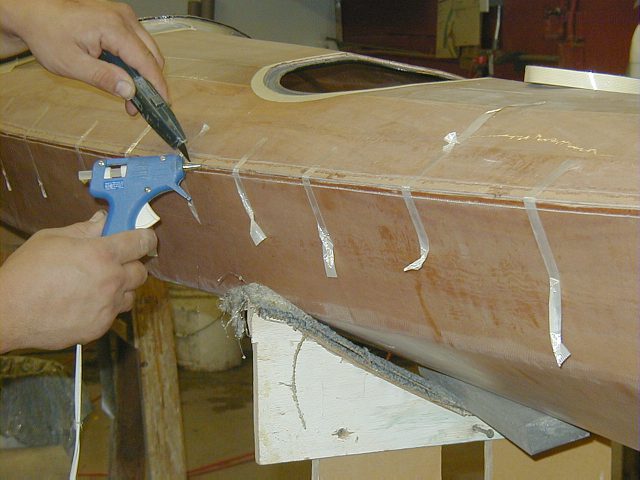 |
When the entire perimeter of the kayak is held together with the tape, I go along the joint with a utility knife and clean up any misalignment and inject a drop of hot glue every 8" in the groove to prevent the plywood edges sliding relative to each other. By the way, since it is difficult to hold the plywood edges perfectly corner to corner as we could do when we had the help if internal stations, I rest the corner of the deck edge about 1/16" (1mm) over the top of the inside edge of the hull plywood. This helps to keep the V groove of uniform width and adds some stability to the joint. |
 |
Now
that the shells are aligned we need to strengthen the bond and make it permanent.
We can proceed in two ways. The fast way is to add epoxy putty stitches
along the hot glue stitches, let it harden, cut out the hot glue stitches,
remove the reinforced tape and tape over the entire length of the sheerline
joint with a masking tape. Turn the kayak on its side and tape
the inside sheerline the same way as is shown on the strip kayak. Although this method is fast, the clear epoxy will leak between the plywood edges and collect inside the masking tape. The result will be non uniform coloration of the sheerline joint which is OK if you plan to paint it over by a decorative stripe and also some additional filling of voids will be needed.. |
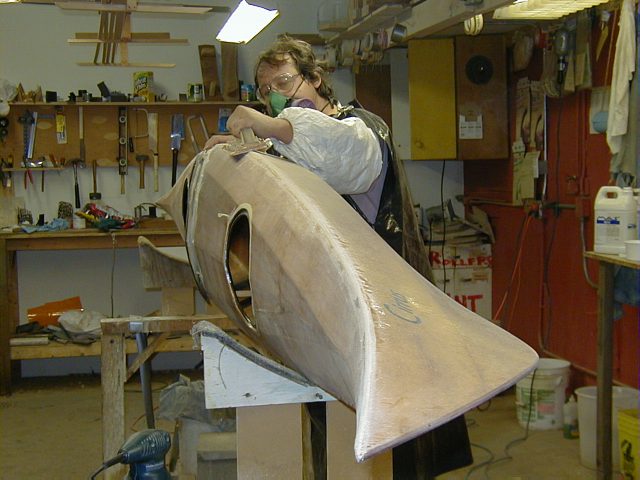 |
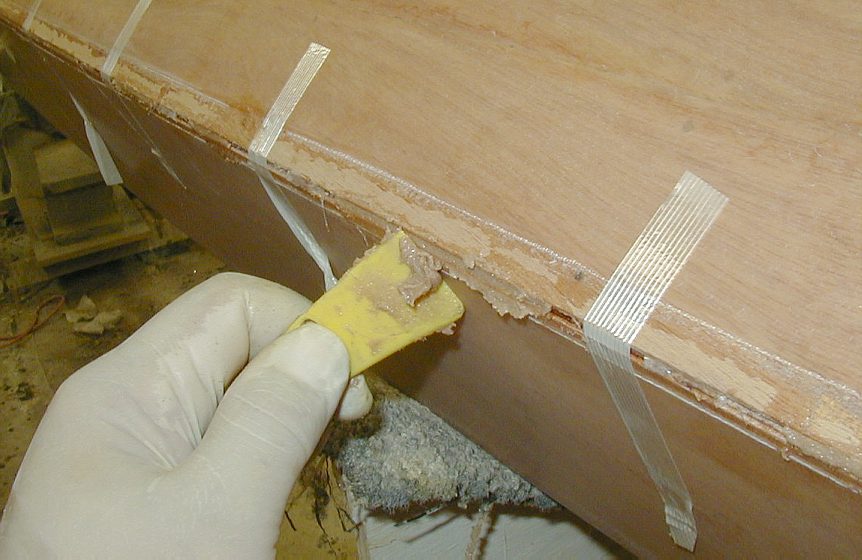
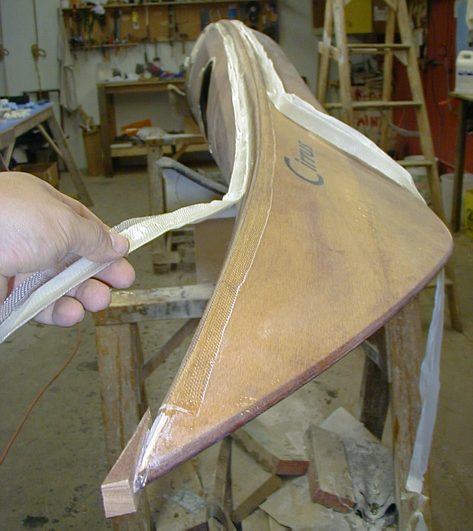
The other, slower method is to add the epoxy stitches at the sheerline, let them harden, cut out the hot glue, remove the tape and apply the epoxy putty along the entire sheerline joint. Build up the sheer bead a little beyond the surface of the plywood so that it can be sanded nice and flush later without going back and filling low spots. This picture illustrates fairing/ sanding of the sheerline bead. The advantage is that the coloration of the sheerline is uniform. I still recommend to tape over the entire joint before glass taping the inside seam just in case the epoxy leaks through some pinholes. |
 |
Peeling the masking tape off the sheerline after inside sheer glassing. If you look carefully, despite the join having been filled completely with epoxy putty on the outside, the epoxy has seeped through pinholes which is visible as the darker spots on the masking tape. |
 |
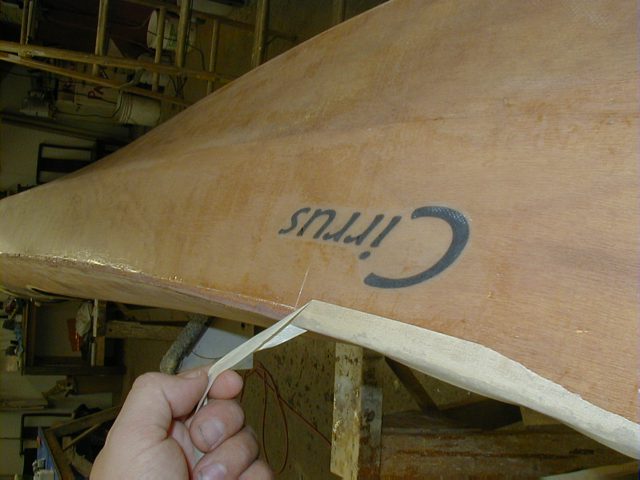
This
picture shows the trimming of the sheerline fiberglass tape. This was done
the same way as shown here. Also note the wood block bonded to a flat facet sanded into the deck tip. When the block is shaped it creates a nice finished kayak tip. |
| << back | INDEX | next >> |
| Home | Kayak Designs | Kayak Shop | Materials | Kayak Gallery | About us |
| Building Manual | Plans | Sandwich Core | Wood Kayak | Order | |
| Epoxy Test | Abrasion Cloth | Rudder | Resources | Choosing Kayak | Guestbook |
If you notice any problems with the site (i.e. error links, missing images) please, let me know. Thanks
Mail:
Vaclav Stejskal
10 Colonial Court apt. 73
Stoneham, MA. 02180
USA
Tel: 781-481-9261
© 1999
- 2020 Copyright Vaclav Stejskal
All rights reserved
Last page update:
11 January 2020