
|
||||
| INDEX | next
|
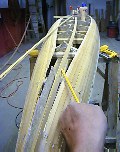 |
The
following stripping technique shows that you can create concave (hollow)
surfaces with strips that rival any composite craft made in a mold. Wood strips are often flexible to contour just about most curved surfaces with a normal parallel stripping technique. There is a limit, however, in the case of hollows or concave surfaces forming at the base of skeg-like keels and sterns. Sometimes, even 5/8" bead & cove strips refuse to twist and bend into the right shape . A large percentage of strips starts to break unless steamed. If they don't break, they will pull off the stations, changing the hull shape and altering the performance of the kayak. The solution to this problem rests in changing the stripping pattern to reduce the severity of the compound bending. Any kayak with a sharp keel at the stern is a good subject for this technique. The Cape Ann Expedition is one of them. Strip the hull to the point when the strips really start to refuse to conform. Take a new strip and run it roughly in the middle of the deepest hollow on the stations and almost parallel to the keel. You will notice that the absence of compound twist (bending in two directions and twisting at the same time) makes the strip quite pliable and easy to hold down. |
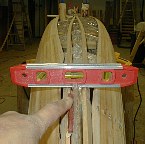 |
The next step is to staple on a symmetrical counterpart to get a point of reference when the other side is stripped over. Here, I am using a torpedo level to make a fine adjustment to get the strips even and level. Staple them down firmly and make sure the curve they form looks fair(smooth) to you. |
 |
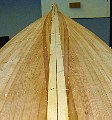
The
keel is easily stripped now. Do one side first, then the other. |
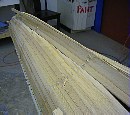 |
The
strips that were so hard to bend before are just rough cut and butt joined
to the special keel strip you stapled on first. Shape the angle on the strip ends by knife and dry fit it too see how big the gap is. The important thing is that gap is smaller than the filler strip that will be inserted later. The hull strip should make contact with the keel strip so there is a continuity of the surface even though the strips are not glued across the gap. Do not force the hull strips against the keel strip. This just makes it bend inwards and makes the stern unfair. |
 |
The
filler strip (square edges) that spans the hull-keel gap is usually (1/4"x
1/2" - 5/8") wide and should be made of the most flexible wood
you can find . Staple it to the hull so that it covers the gap completely.
Make sure to proceed from the kayak middle towards the stern. If the gap
you left is small enough, there will be a lot of material to staple the
strip to. Scribe lines along the edges of the strip, giving it the proper twist as you go (the strip should be flat on the surface so that the lines are transferred correctly). Stapling the strip as you go frees your hands to give the strip more twist and to transfer the lines more accurately. Either way, it is better to cut a smaller groove than too wide and be left with wide gaps that have to be filled later.. |
 |
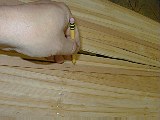
It
is VITAL that as you cut along the line with the Japanese pull saw,
keep the saw blade PERPENDICULAR (square / 90 degrees) to the patch
of surface you are cutting. This means that when you start the cut at the
kayak mid section the blade is almost plumb but as you proceed toward the
keel the blade should be leaned more until you end up completely horizontal
at the end of the stern. (It is called a 'running bevel') Notice that the slot cut for the filler strip (in the photo) had to be cut with the saw blade pretty much horizontal at the stern. Next, shape and dry fit the strip from one end to the other until it slips into the slot snugly. |
 |
One filler strip in, the other ready to be glued in. |
 |
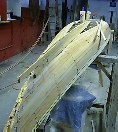
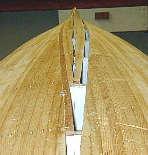
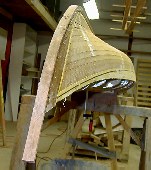
Finished
stern. Notice, that before, there was a sharp break in the curvature of
the surface at the hull-keel boundary, but it looks much better now. The
strip angle is roughly midway between the adjoining surfaces. |
 |
The stern, completely done with two bass wood keel strips added later. The keel strips are optional. |
 |
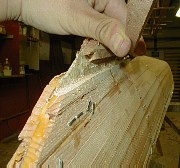
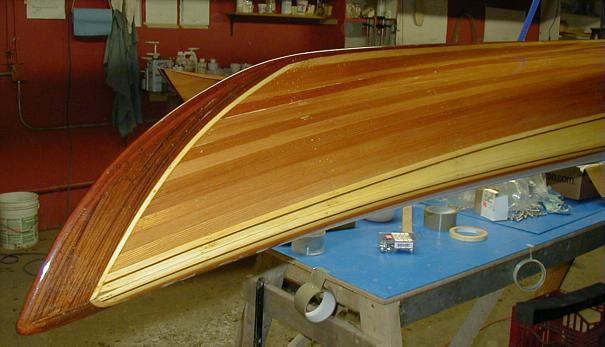
The
rest of the stem is done the same way as on any other kayak. The hollow between the keel and the hull is sanded into nice smooth curve with a disk sander. |
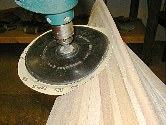 |
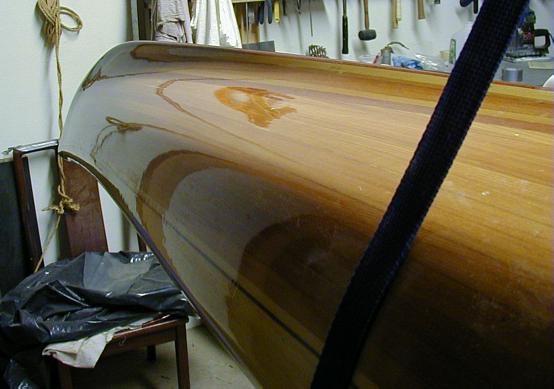
Transforming
the hollow into a smooth and fair surface with a disk sander. Notice the darker red strip in the middle. It is the filler strip that was inserted later into the hull-keel gap. The 7" 36 grit paper is intentionally larger than the 6" rubber disk. The large paper is far less likely to sand grooves into the wood because there is no pressure on the edge! You can also sand different radii hollows by tilting the disk to the side. There is NO better tool for this job. If you don't have a disk sander, do it with an orbital sander (60 grit) or by hand. Planes will not work here. |
 |
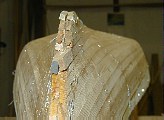
This
is what the stern looks like before any final shaping is done on it. The
redwood is very flexible wood for stem band lamination like this. Two 1/4"x
3/4" conformed to this curvature without a problem. I take a lot of care not to scrape the hull unnecessarily so I chose a lighter and softer wood for this. For rougher handling I suggest multiple layers of thin hardwood strips or thicker pieces that are steamed. |

 |
|
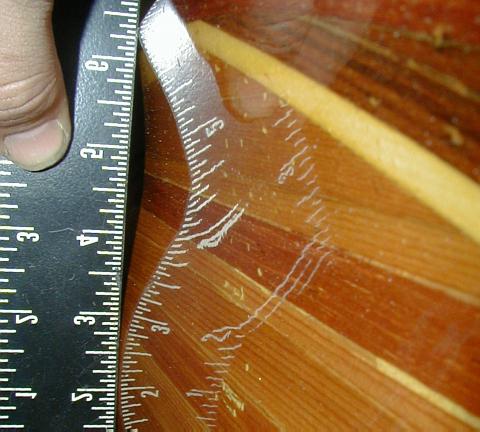
 |
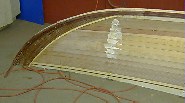
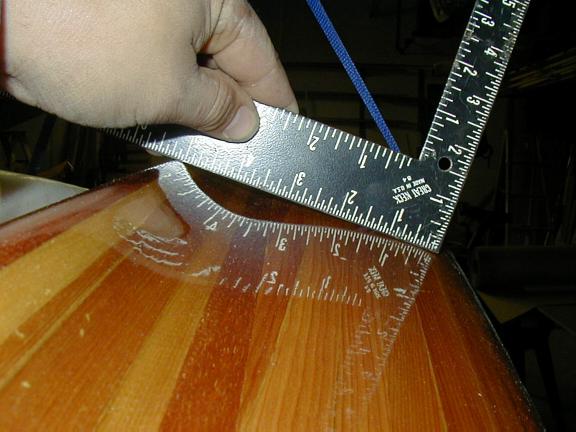
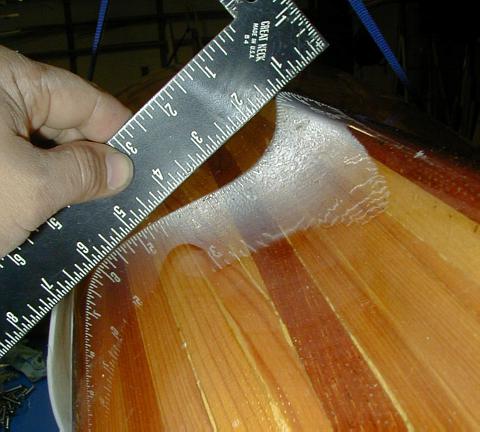
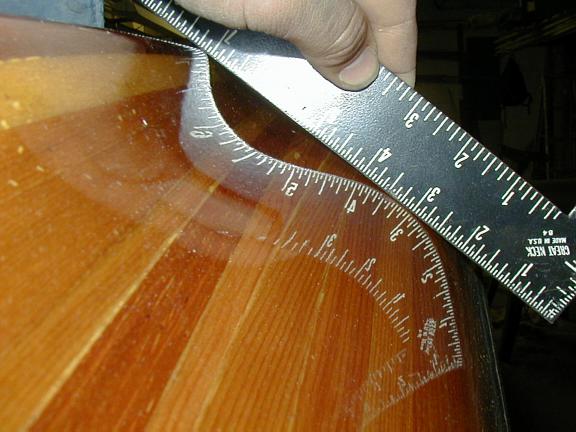
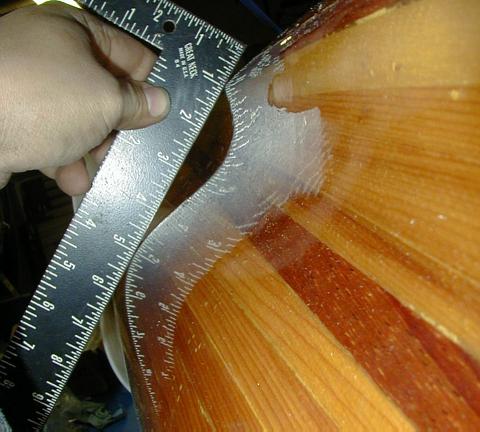
The reflection of the square shows the profile of 'the pinch' between the hull and keel at various positions along the keel line. The transition is easily smoothed with the disk sander. The darker red strip is the filler piece and it runs from the bulkhead behind the cockpit all the way to the stern. |
| INDEX |
| Home | Kayak Designs | Kayak Shop | Materials | Kayak Gallery | About us |
| Building Manual | Plans | Sandwich Core | Wood Kayak | Order | |
| Epoxy Test | Abrasion Cloth | Rudder | Resources | Choosing Kayak | Guestbook |
If you notice any problems with the site (i.e. error links, missing images) please, let me know. Thanks
Mail:
Vaclav Stejskal
58 Wood Ln.
Acton, MA 01720
USA
Tel: 781-481-9261
© 1999
- 2024 Copyright Vaclav Stejskal
All rights reserved
Last page update:
9 May 2024